/admin/roles
Menu: Workspace → Users · Route: /admin/users (super admins only)
Two different things
- Workspace membership — adding people to your workspace and choosing their role — is covered in Workspace, members & security policy.
/admin/usersis the platform-wide User Administration console. It is a super-admin tool that spans every organization and workspace. See Platform user administration below.
How the model works
- A permission leaf is one granular ability, identified by a dotted id such as
comerix.flows.publishorcomerix.insights.reports.view. - A role collects many permission leaves under one name.
- Each member holds a role per workspace, so the same person can have different roles in different workspaces.
| Example role | Grants | Good for |
|---|---|---|
| Builder | comerix.flows.* | People who design and publish flows |
| Analyst | comerix.insights.* | People who read reports and dashboards |
Super admins bypass workspace permission checks entirely. Grant this status sparingly.
Browse roles
- In the left sidebar, choose Access → Roles.
- The list opens at
/admin/roles.
Create a custom role
- On the Roles list, click New role.
- Enter a name (must be unique) and an optional description.
- Save. The role opens in the editor so you can grant permissions.
Grant permissions to a role
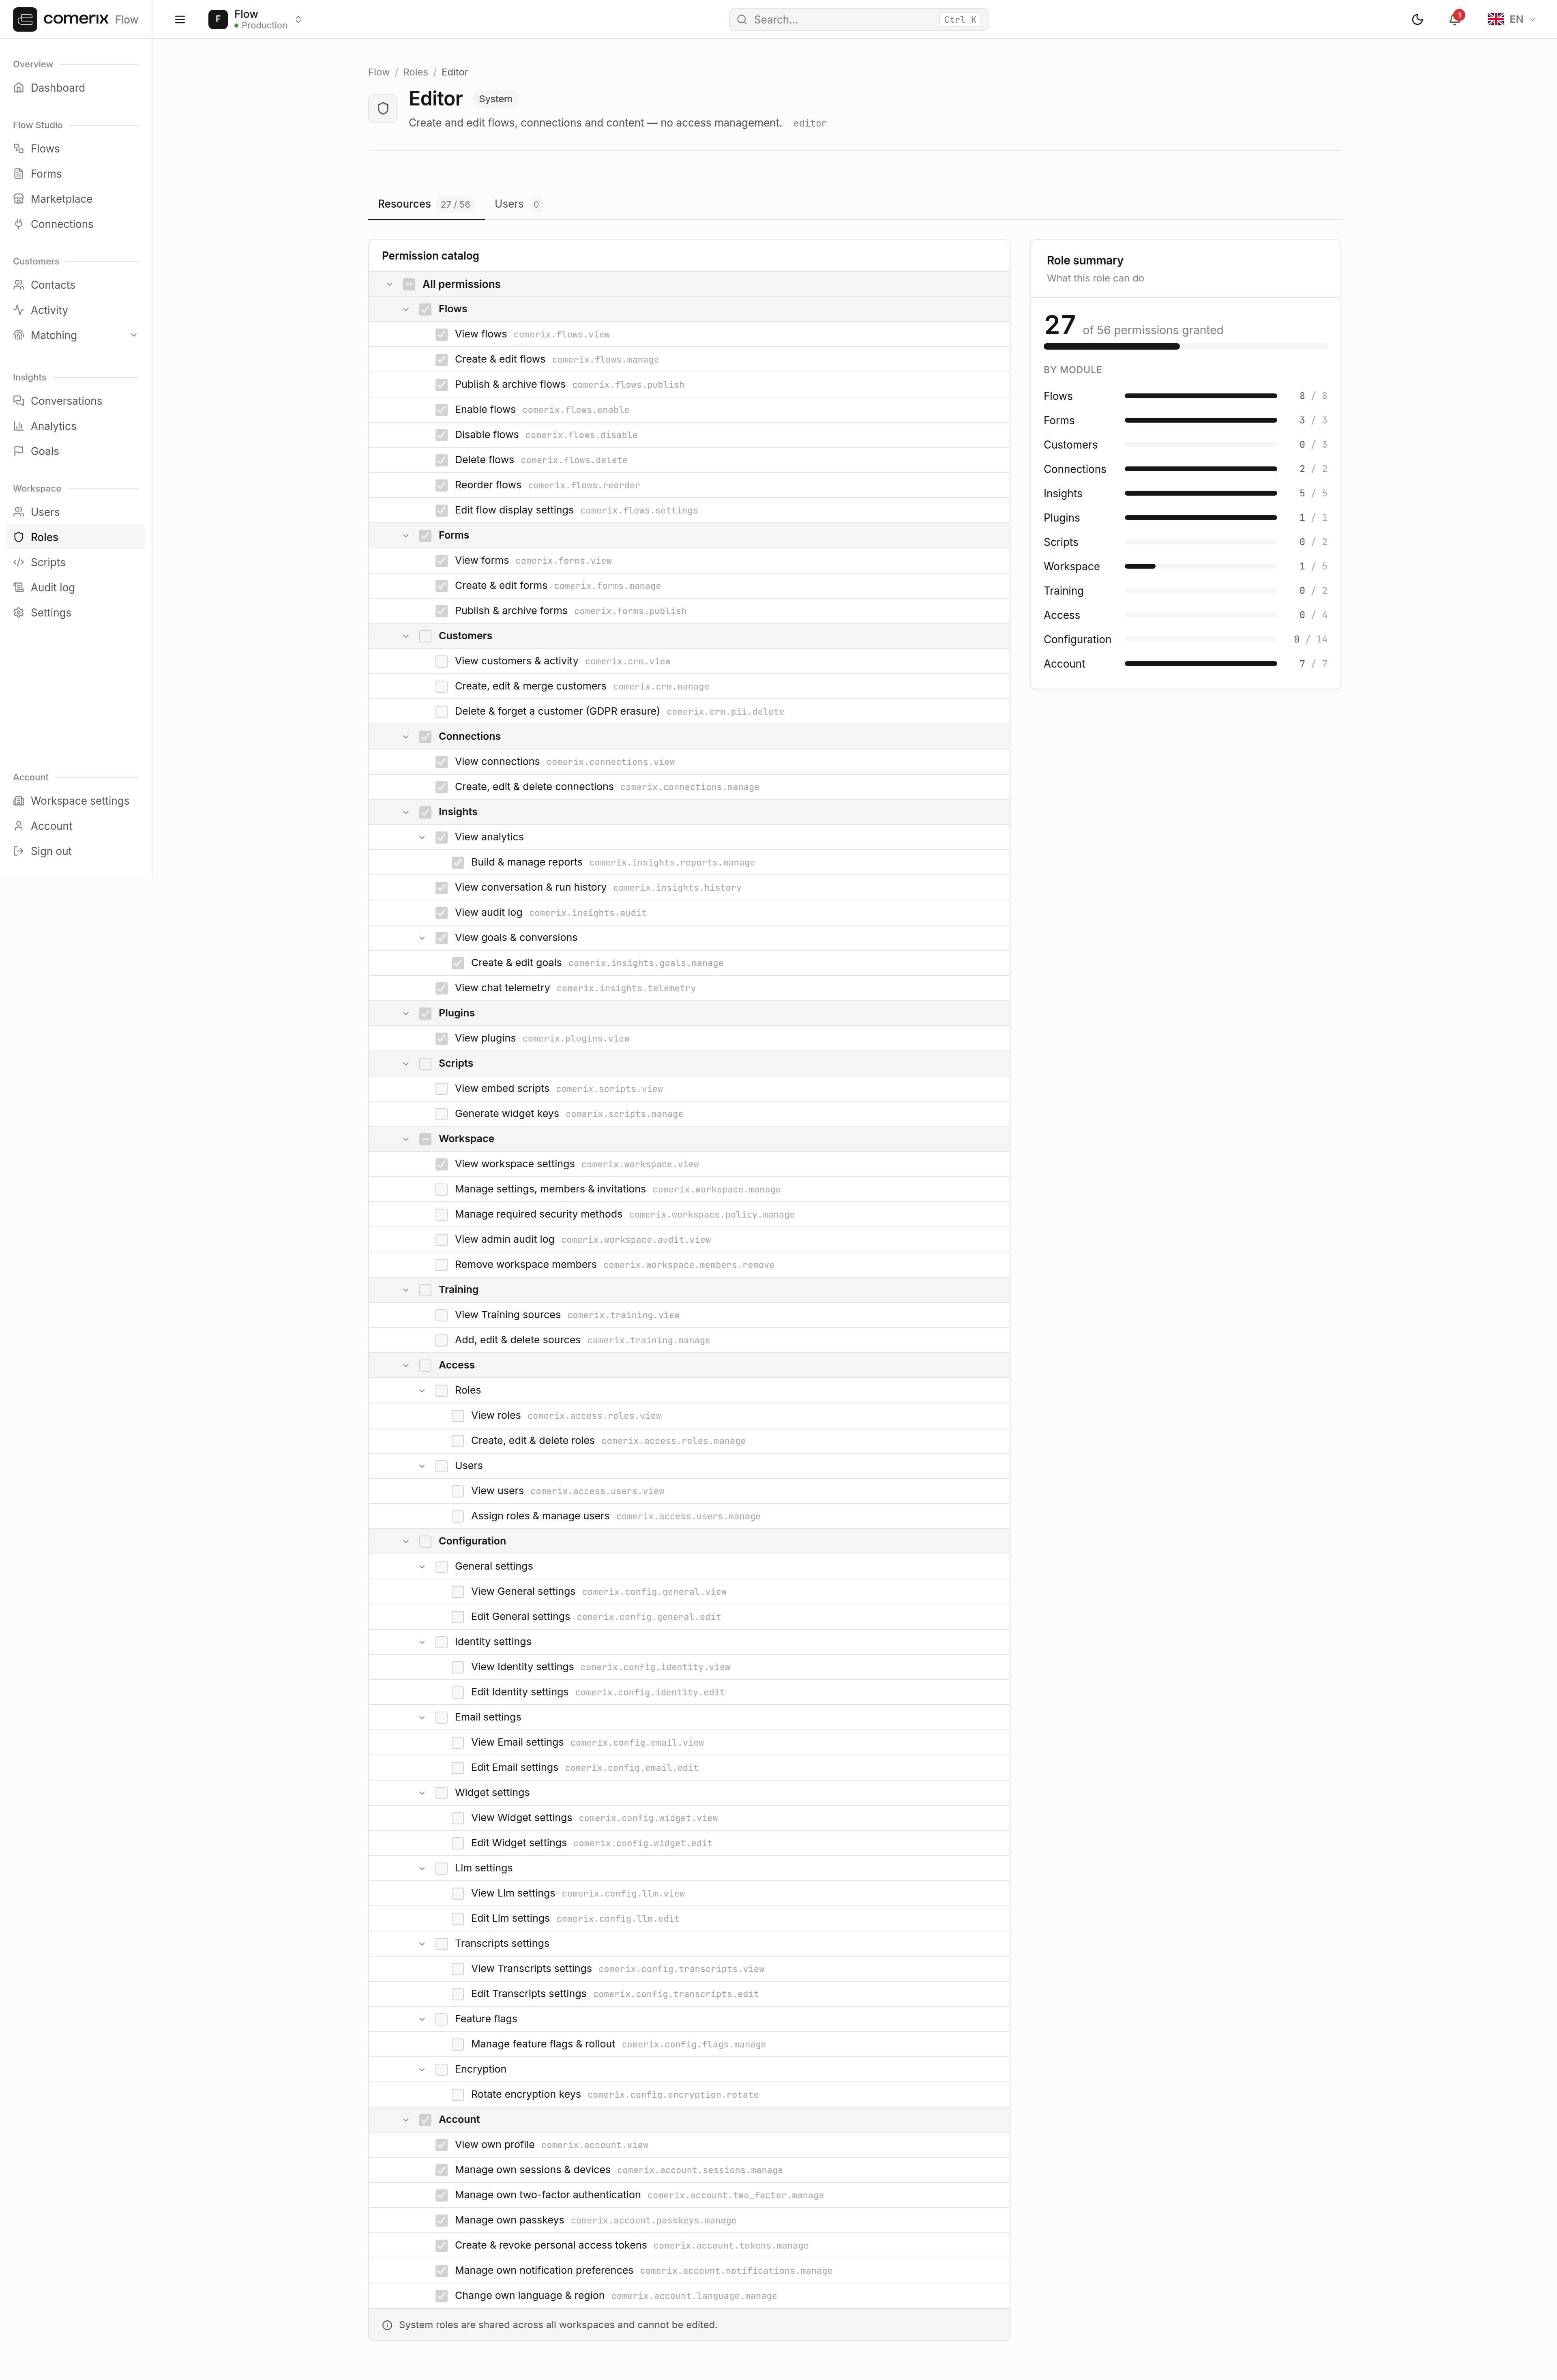
- Open a role and select the Resources tab.
- Work through the permission tree — it nests from
comerix→comerix.access→ … down to individual leaves. Tick the boxes you want to grant. - Use Select all / Clear all and Expand all / Collapse all to move quickly.
- The summary sidebar shows X of Y granted per module as you work.
- Click Save.
Reassign a member
- Open a role and select the Users tab.
- You see every member who holds this role.
- To move a member, pick a different role for them, or remove them from this role.
Platform user administration (super admin)

/admin/users is the platform-wide User Administration console. Unlike the role-based screens above — which stay inside a single workspace — this console lists every user across all organizations and workspaces on the platform. The whole page is gated to super admins (ROLE_SUPER_ADMIN); the Users entry only appears in the Workspace section of the sidebar when you hold that status.
- In the left sidebar, choose Workspace → Users.
- The console opens at
/admin/users.
Create or edit a user
- Click New user to open the create dialog, or the Edit (pencil) action on a row.
- Set the email (required and unique), an optional name, the interface locale, and the Active toggle.
- Choose a home workspace and a role for that workspace. You can pick a global system role or a role owned by the chosen workspace.
- Toggle Super admin to grant or revoke platform-wide super-admin status.
- Save.
Editing the role on a user updates their role in the selected workspace only. A user can hold different roles in different workspaces.
Activate or deactivate
Use the per-row Activate / Deactivate toggle to change a user’s status.Send a password-reset link
Use the per-row Reset password action to email the user a fresh password-reset link. This never reveals or sets a password directly — the user sets their own from the emailed link.Impersonate a user
- Click the Impersonate (eye) action on a row and confirm.
- The platform switches your session to the target user using Symfony’s
switch_usermechanism. - While impersonating, a persistent banner at the top of every page reads “Impersonating … — you are viewing the app as this user.” with an Exit impersonation link that returns you to your own account.
Bulk actions
Select rows with the checkboxes, then apply a single action to all of them at once: activate, deactivate, delete, or assign a role in a chosen workspace. Skipped rows (for example, your own account, or the last remaining super admin) are reported back to you.Deleting a user
Deleting a user is a GDPR-style anonymizing erasure, not a physical row delete: it drops all the user’s workspace memberships, revokes every role, deactivates the account, and scrubs the identity. The record itself is retained so the append-only audit log stays intact. The platform refuses to delete your own account or the last super admin.Permissions
| Action | Permission |
|---|---|
| View the workspace user directory | comerix.access.users.view |
| Assign roles & manage workspace members | comerix.access.users.manage |
| View roles | comerix.access.roles.view |
| Create, edit & delete roles | comerix.access.roles.manage |
Platform user administration is super-admin onlyThe cross-tenant User Administration console at
/admin/users is not governed by these permission leaves. Every action on it requires platform super-admin status (ROLE_SUPER_ADMIN), and impersonation additionally requires the switch_user privilege, which is restricted to super admins. Super admins bypass workspace permission checks entirely — grant the status sparingly.